Instructions for using room 251 in Learning Commons
Reservations
The room is available for reservations from 8 am until 7 pm on Monday through Friday. The room seats 42 students at
6 conference tables. Additional policy information about reservations can be found on the reservations policy page.
It is recommended that you add an extra 30 minutes before and after your class time to your reservation so you
can familiarize yourself with the technology and return it after class, especially if you will be checking out the
laptop cart.
Access to the room
Staff members seated at the second floor service desk will unlock the room for you. If you will be using library
laptops for your instruction session the laptop cart can also be checked out to you at the service desk (portable
microphone and headsets for the hearing impaired are also available for checkout).
Once in the room
Instructors can either use the computer in the podium to display content or they can use their own laptop. If you
are using the computer in the podium make sure that it is turned on. If you are using a laptop, make sure it is
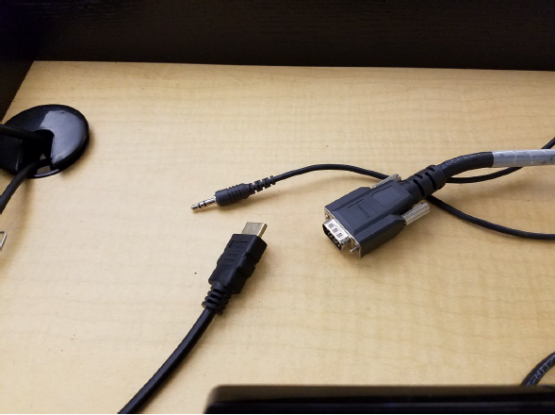
plugged into the podium either with the HDMI or the VGA cables provided. Make sure the monitor is turned on.

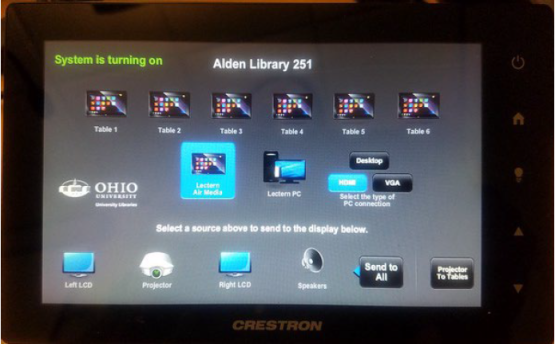
Push the power button located on the Crestron display screen.
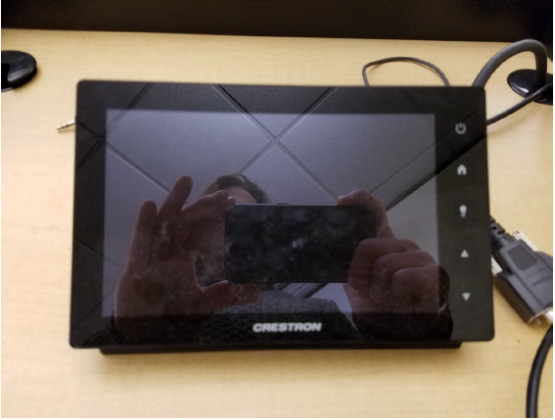
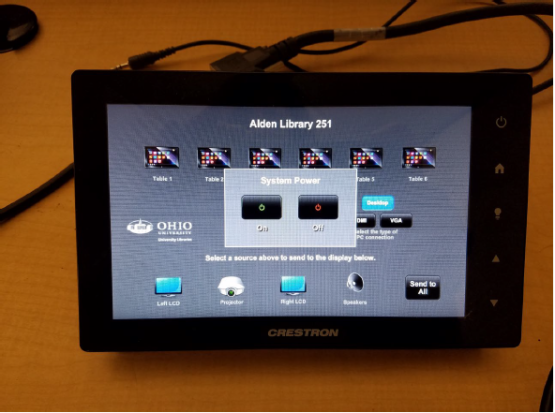
A prompt will display for System Power, press the green ‘On’ button.
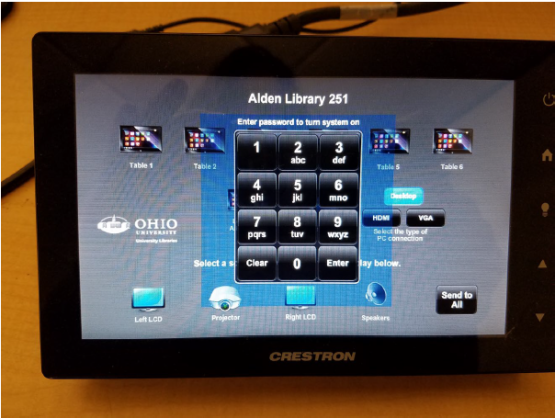
Type in the code and press ‘Enter’ (the code is HORN or 4676)
The overhead projector and the six table monitors should come on.
To display the podium computer or your laptop on the three screens on the front walls of the room, use the
middle section of the Crestron display to make your selections. Push ‘Lectern PC’, then either Desktop (for podium
computer) or HDMI or VGA (for a connected laptop), depending on which computer or connection you are using,
then push “Send to All”. Once you have done this, if you want the front wall content to show on all the screens in
the room, click “Projector to Tables” in the lower right-hand corner.
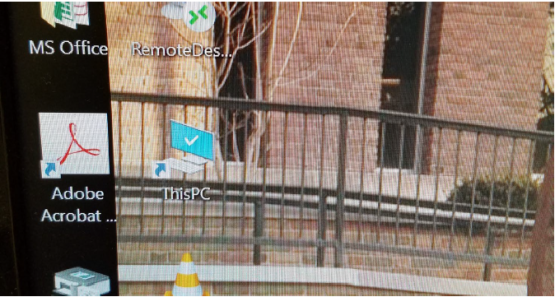
If you are using the podium desktop and you have brought your own flash drive, the icon on the desktop screen
you will need to click on to access that flash-drive is “ThisPC”.
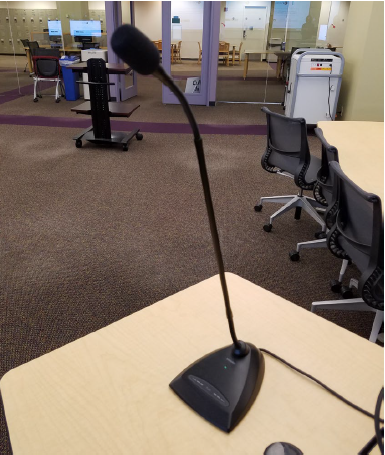
The room is equipped with a speaker system and the volume control is located in the bottom right corner of the
Crestron display. The microphone on the podium is connected to the speaker system. To use microphone, push the
button on the microphone labeled “Push” and the green light will come on indicating you now have a live mic. (The
headsets for the hearing impaired have a direct line to that microphone so anything said into the mic will go to the
headsets as well as the speakers in the room)
When you are finished with the room please turn the system off by pushing the power button on the Crestron
display and then selecting “Off” on the screen. As you exit the room please turn the lights off (on the wall next to the door
or on the front wall by the podium) and make sure the door closes.
With the information above you should be able to use the room for the standard lecture scenario. If you would like
to have a more active classroom, 251 is also equipped with Air Media technology that will enable both you and the
students to connect wirelessly to the monitors in the room to display and share content as well as work in groups.
Air Media
Each conference table in the room is equipped with a monitor. Each monitor has a URL at the top. To connect
wirelessly to this monitor simply type the 10-digit number at the end of that URL into a browser. The number
should start with 10.144.28 and then the last three numbers will vary depending on the monitor. Once you have
typed that number into your browser’s address bar, hit enter. The next screen will ask you to download the
attachment for either a PC or for Mac, depending on the device you are using. Download this file, then open it. A
popup will appear asking for a code. The code is located at the top right corner of the conference table monitor
and this code varies depending on the monitor.
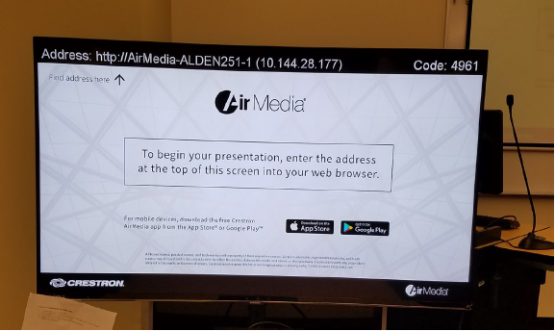
The instructor can also connect to the front screens using Air Media if they wish to use a laptop from anywhere in the room. Go to the Crestron display, click on “Lectern Air Media” then “Send to All”. The Air Media login page will appear on the front wall displays.Log in to the system the same way you would from a conference table and you will then be displaying your laptop content on the front walls.
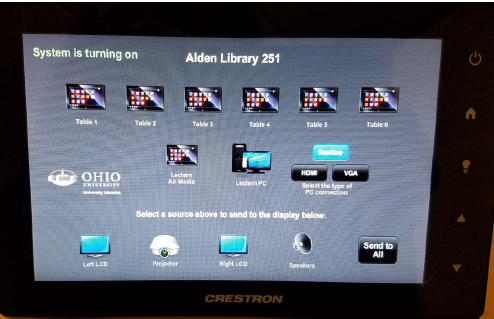
The instructor can also display content from the 6 monitors located at the tables. The tables are numbered 1
through 6, starting with the table directly in front of the podium and moving clockwise around the room. To
display the content from one of the tables, push the corresponding icon at the top of the Crestron display, then
select “Send to All” or one of the other display options on the bottom row of the Crestron display.
The Air Media systems can also be accessed using the app described on the login screen. The app can be
downloaded from the App Store or Google Play.